Luke Skywalker_Step by Step
As you can see on my previous blog entry, I made a watercolor painting of Luke Skywalker on a blank A6 size postcard. While making this painting, I have scanned some of the processes in order to make a step by step explanation of it. Here you go…
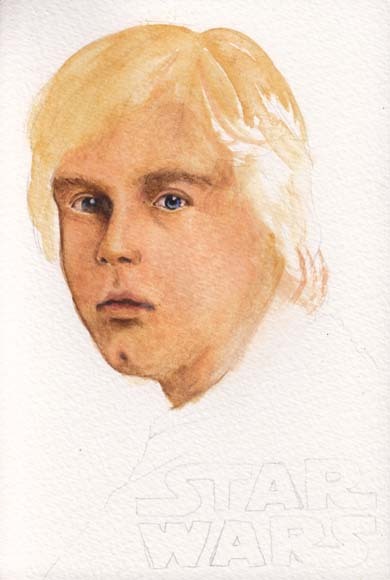
1. Sketch
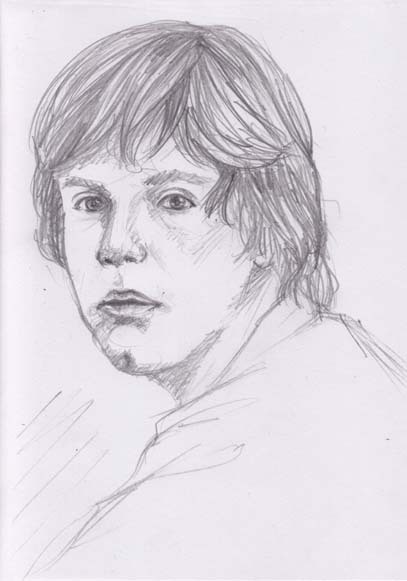
First step is making the sketch. Actually I didn’t plan to make this painting at all. I was just browsed too much about Star Wars on last Wednesday regarding their blu ray release. I love Star Wars. And I just realized that I never made a fan art of it. Not at all. Wondered why. So there I was… Sitting in front of my laptop which was displaying Luke Skywalker picture. I took my paper and B pencil (yeah, I always draw a sketch with B pencil. Never use 2B.) and I ended up with this drawing. It’s a small drawing. Only on A6 paper.
2. Prepare all you need
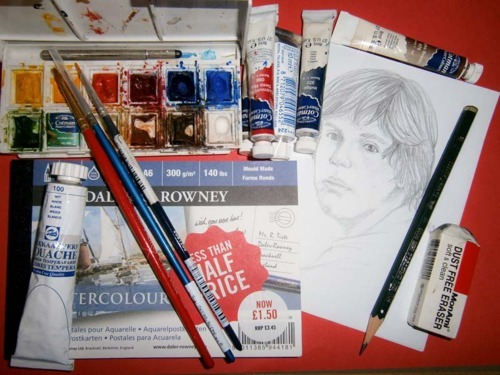
My weapoonnnns! Yes, they are things I need in this painting. The sketch, B pencil, eraser, watercolor paint (mostly Cotman, since my fav watercolor brand, Sakura transparent watercolor is no longer produced here), white gouache, fine round brushes and watercolor postcard! I totally forgot that I have this blank postcard. I bought it two years ago when I was in London at an art supply store near Leicester Square… I guess. I forgot the exact location. (And yes, it was discounted. Haha. Cheap. I got the paint set at the same store and of course it was also discounted.)
Not to mention you will need lightbox/tracing desk and scanner as well.
3. Tracing
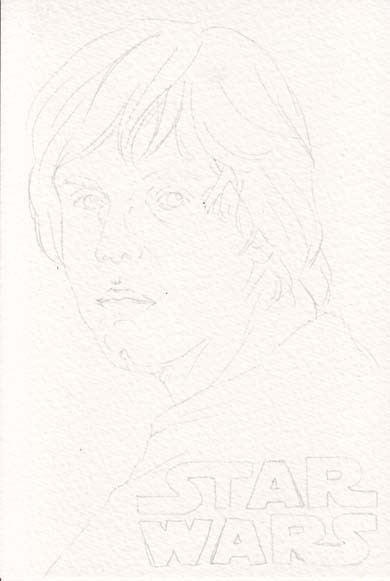
And now it’s time to get your lightbox! or tracing desk or whatever you call the things that allows you to trace your own drawing. It’s the easiest part of the whole process. Everyone can do it. I just need to trace my sketch into the postcard and add the STAR WARS letter.
4. Now, let’s start painting!
Everyone has different color palette and here is mine. The paints that I used for this painting.

Naples Yellow Red (first time I use it. Usually pale orange), yellow ochre, burnt sienna, vandyke brown (my fav paint color), sepia, indigo, alizarin crimson hue (or red!) and of course white.
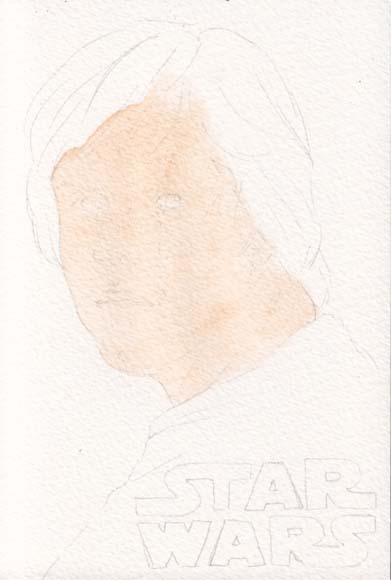
Okaaaay. Let’s start with the face. Actually it would be better if you start with the background first, but I was too excited to paint Luke’s face. So… don’t worry. Start wherever you like.
Apply the white paint on his face, followed by naples yellow red before the white one get dried. Wet on wet painting is the technique I used every time I’m too lazy to mix the color on palette. So, I just mix them right on the painting. Haha. (Seriously, don’t follow this tips. Not good.) Now, let them dry.

Then, I grabbed my yellow ochre paint and start to paint the shadow on his face, around his eyes, nose, lips, everywhere that is darker. (Don’t worry about how it looked on this step. I know the pic above looks horrible.) I also applied blue paint on his eyes and a slight red on his lips.
Important tips: It is much much much better to apply the paint over and over again in layers than apply the thick and bold paint in only one layer. You will get a brilliant color if you do the painting in layers. It needs patience and time, but trust me… it’s worth it.
Like I said in the previous step, don’t get lazy to repeat the process until you get the color you desire. I still use the same colors (naples yellow red, yellow ochre and vandyke brown) for his face.
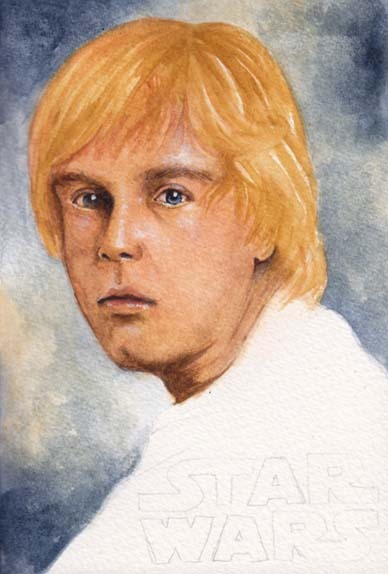
And now his face is getting better! I put the basic paint on his hair, which is yellow ochre and move on to the background. I just mix the indigo paint and yellow ochre plus water here and there. Control the thickness with the amount of water you mix with the paint.
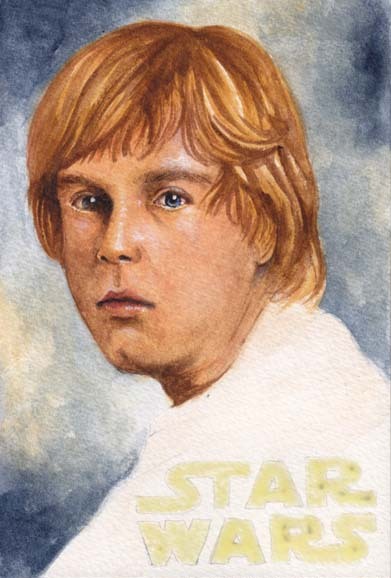
After his face is getting better, let’s fix the hair. I used burnt sienna after the yellow ochre. The STAR WARS letter became yellow-ish because I put masking fluid on it. Masking fluid is used to cover the are that you don’t want to paint. Let the masking fluid dry, apply the paint, and the masked area will be save. After it’s done, you just simply remove the dried-masking-fluid with your eraser. I applied the masking fluid on the letters because I was gonna paint the cloth on the next step.
Masking fluid makes my life easier….
Next, I colored the cloth with white and sepia. On the pic above, I’ve already removed the masking fluid. You can see that the letter remained clean. No paint can touch them. :D
I paint the hair as well. Put more dark shadow on it with vandyke brown and sepia paint.

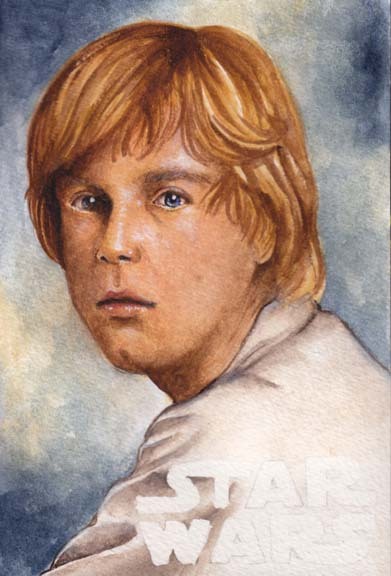
Yes, it’s finishing time! Work on the light and dark shadow here and there. I always LOVE to apply white gouache to create light area on face. It will make the face a lil bit like shinning. haha.
And don’t forget to paint the letters.
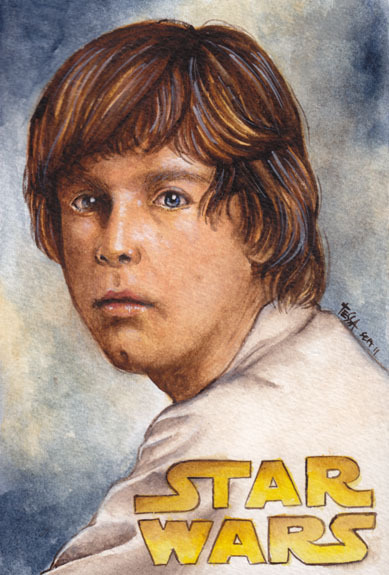
And…. Voila! The painting is done.
Time taken: 5 hours in total or could be less. I also chatted online with my friend during this painting. He loves Star Wars too :’)
Tessa
x


Comments
Post a Comment